
Have you noticed cracks or uneven patches on your walls that ruin the look of your home? Or perhaps the finish on your walls isn’t quite as polished as you’d like? These are common problems, but the good news is they can be fixed. Learning how to plaster a wall can make a significant difference to your interiors, giving them a clean and professional look. If you’re in Bournemouth, you’re in the right place for plastering advice. And if the project feels overwhelming, the experts at Plastering Bournemouth are just a call away.
This guide will take you step by step through plastering a wall, from understanding what wall plaster is to essential tools and techniques. Whether it’s a small DIY project or preparing for external wall plastering, our tips will help you achieve a professional finish.
What is Wall Plaster?
Wall plaster is a material used to create a smooth finish over walls and ceilings. Made primarily from gypsum, lime, or cement, it’s designed to cover uneven brick or blockwork, preparing the wall for paint or wallpaper. More than just aesthetics, plaster also fortifies walls, protecting them from environmental damage and prolonging their lifespan.
For example, plaster used for Internal Wall Plastering might create a super-smooth surface ready for paint, while external wall plastering might include a textured finish to withstand Bournemouth’s coastal weather. Knowing the purpose of the plaster is important when selecting the material and technique for the job.
Why Should You Plaster a Wall?
Beyond appearance, plastering is essential for strengthening and protecting your walls. Plaster creates a durable barrier against moisture, aids in temperature control, and hides imperfections such as cracks or dents. Every properly plastered wall has the potential to elevate your living space, making it both functional and beautiful.
Tools You’ll Need
Before starting any plastering project, having the right tools will save you time and effort. Here’s what you’ll need:
- Plastering trowel for spreading and smoothing the plaster
- Hawk to hold plaster while you’re working
- Clean buckets for mixing the plaster
- Mixing paddle or drill for creating a smooth plaster mix
- Plastering float to finish edges
- Corner beads for sharp and clean wall edges
- Protective sheets to safeguard floors and furniture
- Sponge or sandpaper for smoothing imperfections
Investing in good-quality tools will make a noticeable difference to the final result and improve your plastering experience.
Step-by-step Guide to Plaster a Wall
1. Prepare the Wall
Preparation sets the foundation for a successful plastering project. Start by brushing or vacuuming the wall to remove dust, dirt, or grease. For walls with cracks or holes, use filler to patch these up. Highly porous surfaces like bricks will need dampening with water to prevent them from drying out the plaster too quickly. Alternatively, you can apply a coat of PVA adhesive to provide an even, tacky surface.
Take your time during this step because an unprepared wall will lead to uneven plaster, which costs more effort later. Experts at Plastering Bournemouth recommend always prepping the wall thoroughly, especially for homes in Bournemouth where bricks can absorb an unexpected amount of moisture.
2. Mix the Plaster Properly
Professionals know that mixing plaster the right way can make or break your plastering job. Start by pouring clean, cool water into a bucket, then slowly add the plaster powder while stirring continuously. Use a mixing paddle attachment on a drill for a smooth and lump-free consistency resembling thick cream. The mix should stick to your trowel without being runny.
Ensure you mix only the amount of plaster you can use within its working time, typically 30-40 minutes. Over-mixing or letting it sit too long will change the texture, wasting materials.
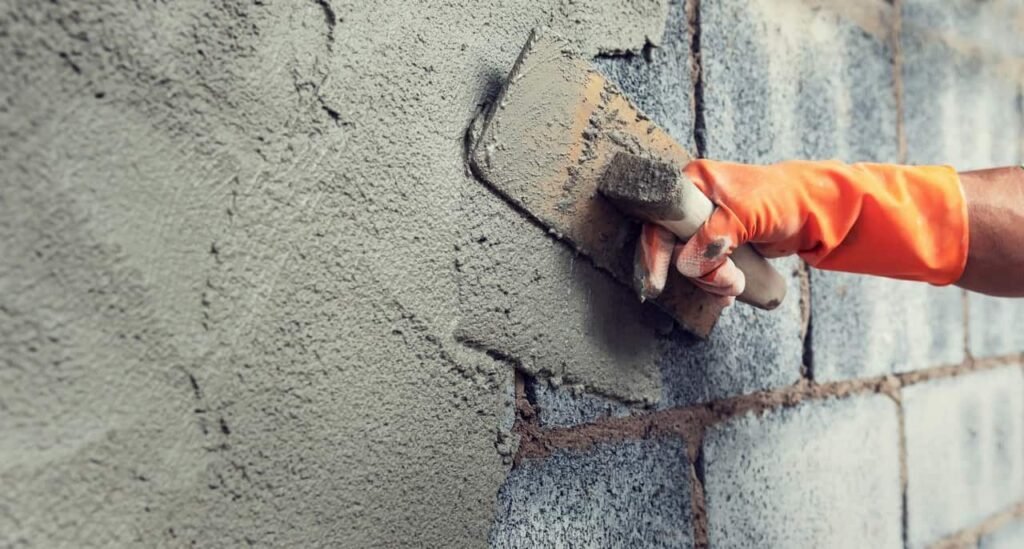
3. Apply the First Coat
Spread the plaster onto your hawk, and scoop it onto your trowel. Starting at the base of the wall, apply the plaster in a smooth upward motion. Work in strips, overlapping slightly to ensure full coverage. The first coat should be about 1-2mm thick and doesn’t need to look perfect yet. The main goal here is to cover the wall evenly.
By following this step carefully, you create the solid foundation required for the second coat. And if you’d prefer expert hands, Plastering Bournemouth has skilled professionals ready to help.
4. Smooth the Surface
Allow the first coat to settle for about 10-15 minutes before smoothing out imperfections. Use your trowel in sweeping motions to level out ridges or bumps. Adding a small amount of water to the trowel can make this process easier by reducing friction.
Proper smoothing at this stage prepares the wall for the second coat. Skipping this step often results in uneven finishes and more sanding later on, so it’s well worth the effort.
5. Apply the Second Coat
The second coat works to create a flawless, polished finish. This layer should be thinner than the first, roughly 1mm thick. Apply it in a similar fashion, but take extra care to distribute the plaster evenly and eliminate ridges or gaps.
For a professional-grade finish, reduce the angle of your trowel as you smooth out the second layer. Building up experience here will help achieve consistent results, or consider reaching out to a Bournemouth plasterer if you want industry-standard plastering.
6. Finish with a Clean Look
Finishing is where the magic happens. Use a wet sponge and press gently against the wall, working in small circular motions to smooth out minor imperfections. For a sharper finish, sandpaper can be used lightly to remove hardened edges.
Internal wall plastering should focus on achieving an almost glass-like smoothness, while external wall plastering will benefit from a slightly textured surface that withstands weather conditions. Whichever finish you choose, patience in this step ensures professional-looking results.
Internal Wall Plastering vs External Wall Plastering
Plastering techniques differ depending on whether you’re working indoors or outdoors.
- Internal wall plastering enhances a room’s aesthetics. It ensures that paint or wallpaper adheres seamlessly.
- External wall plastering serves a protective role. It combats moisture, weather, and wear, making it ideal for Bournemouth’s coastal climate.
Choosing the right type ensures durability and satisfies the unique needs of each wall.
Common Plastering Mistakes to Avoid
Even seasoned DIY enthusiasts can make mistakes. Here’s what to watch out for:
Rushing the drying process – Failing to allow adequate drying time often leads to cracked plaster.
Skipping preparation – Walls that aren’t properly cleaned or primed won’t hold the plaster well.
Overloading the trowel – Working with too much plaster at once leads to uneven application.
Using the wrong tools – Cheap or incorrect tools make it harder to achieve a smooth finish.
Avoiding these common pitfalls ensures better results, and for stress-free plastering, turn to Plastering Bournemouth for expert assistance.
UK Government Resources on Plastering
Did you know the UK government offers free resources for DIY enthusiasts and professionals looking to improve their plastering skills? Their guidance provides detailed advice on plastering techniques, health and safety tips, and best practices for building and maintenance projects.
For detailed, step-by-step advice on plastering and related areas, visit the official government page on Building and Renovation Guidance. It’s an excellent resource for both first-timers and experienced individuals. Using this in conjunction with expert advice from Plastering Bournemouth, you’ll have all the tools, techniques, and knowledge to succeed.
Why Choose Bournemouth Plastering Services?
Attempting plastering yourself can be fulfilling, but it demands skill, tools, and time. If you’re looking for seamless results, hiring professionals can make a world of difference. Plastering Bournemouth offers years of experience and local expertise, ensuring your walls look impeccable and stand up to Bournemouth’s weather.
Not only do they provide top-quality internal and external plastering services, but they also use the finest materials and methods for lasting durability. Save yourself the hassle and give your walls the care they deserve by opting for professional help.
Final Thoughts
Plastering a wall is a rewarding skill that enhances the look and strength of your home. With the right tools, techniques, and patience, you can give your space a stunning makeover. However, sometimes a task is best left to the professionals. For those in Bournemouth, Plastering Bournemouth is the go-to solution, offering skilled plasterers both for internal wall plastering and external wall plastering.
Are your walls ready for a transformation? If so, roll up your sleeves or call in the experts to ensure a beautiful, polished finish that lasts.
Contact Plastering Bournemouth today and achieve flawless walls that reflect true craftsmanship. From minor repairs to full home makeovers, they’re here to create smooth, stunning spaces!